Configuration
Classifying Worklogs with Tempo Work Attributes
A Jira Worklog records how long you worked, a description, which issue, who logged it. So the moment someone asks a different question, the worklog doesn’t contain enough structured information to answer it. For example:
- How much went into rework rather than new development?
- Which hours belong on invoice INV-2026-0181?
- How much of last month was billable?
Although you may add any information you want to the description field, it has serious drawbacks. Free text doesn’t group, and it doesn’t total. Work Attributes are Tempo’s answer: custom fields attached to each worklog, filled in when the time is logged, and available afterwards as report dimensions.
Although you can answer the third question using worklog attributes, there is a different way to do it in Tempo. We will get into that later.
What a Work Attribute is
A Work Attribute is a field that appears in Tempo’s Log Time form alongside date, duration and description. You define it once, and it applies everywhere: there’s no per-project scoping on the attribute itself, so anything you create shows up on every worklog form in the instance. Some other timesheet apps have per-project applicability.
You’ll find them in Jira under Apps → Tempo → Settings → Configuration → Work Attributes. Click New Work Attribute, specify the following properties, a name, whether it’s required, and a type.
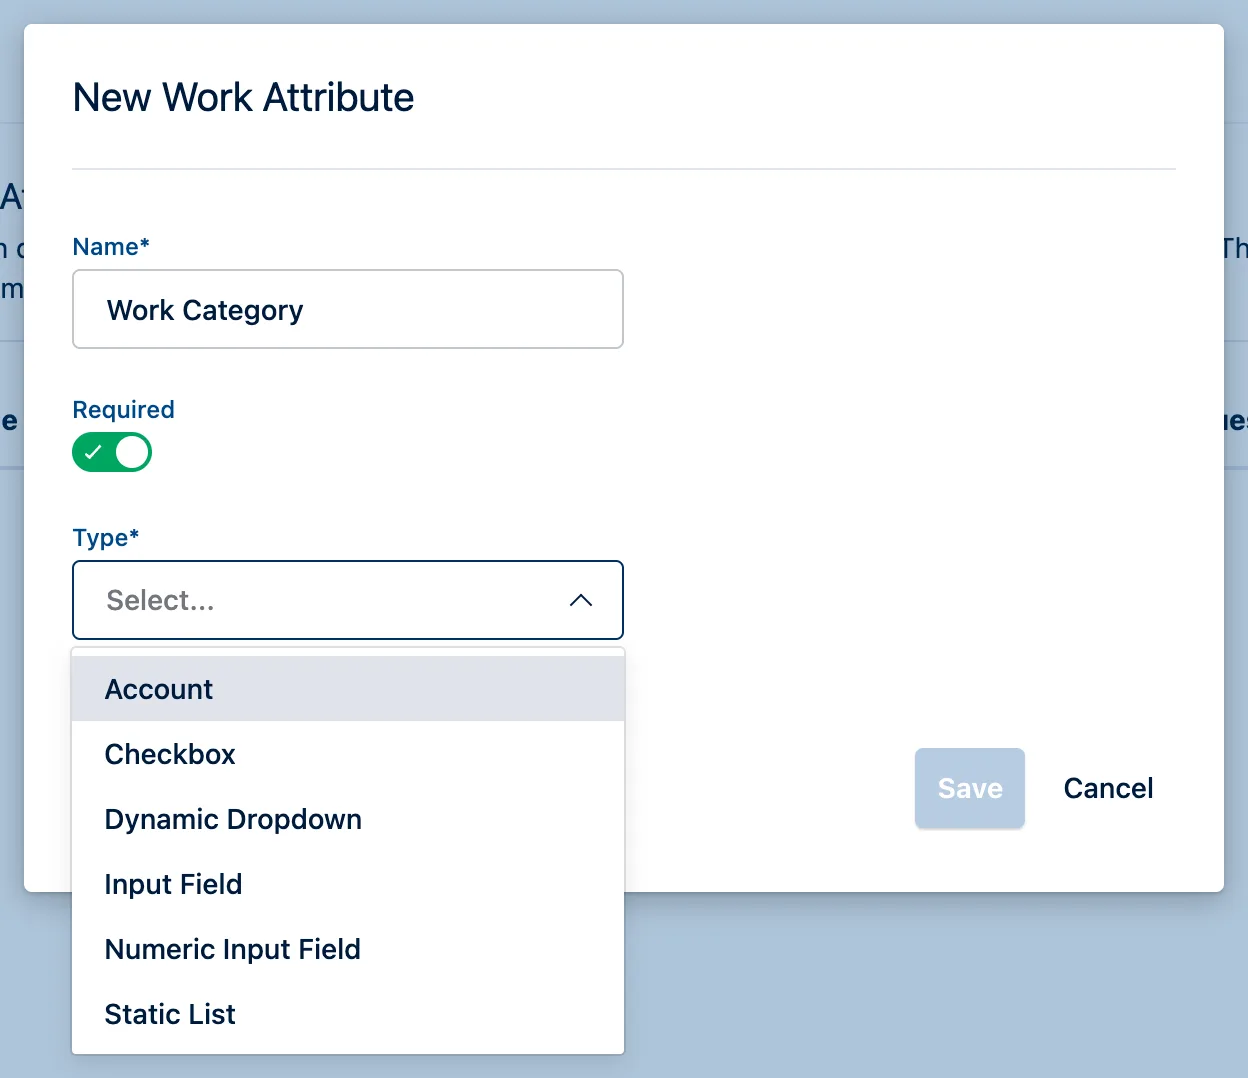
The most important choice is the work attribute type:
- Static List: a dropdown with a fixed set of options you define. Use it for anything where you want everyone picking from the same vocabulary.
- Checkbox: a yes/no flag.
- Input Field: free text, for a reference like an invoice or change-request number.
- Numeric Input Field: a number, for things you want to sum rather than label (kilometres travelled, units delivered).
- Account: not a field you invent, but a link to Tempo’s built-in Accounts. More on this in a moment; it’s the most interesting one on the list.
- Dynamic Dropdown: a dropdown whose options come from an external API you supply. Tempo won’t let you save it until the URL verifies, so this one needs a service standing behind it.
Creating a Static List
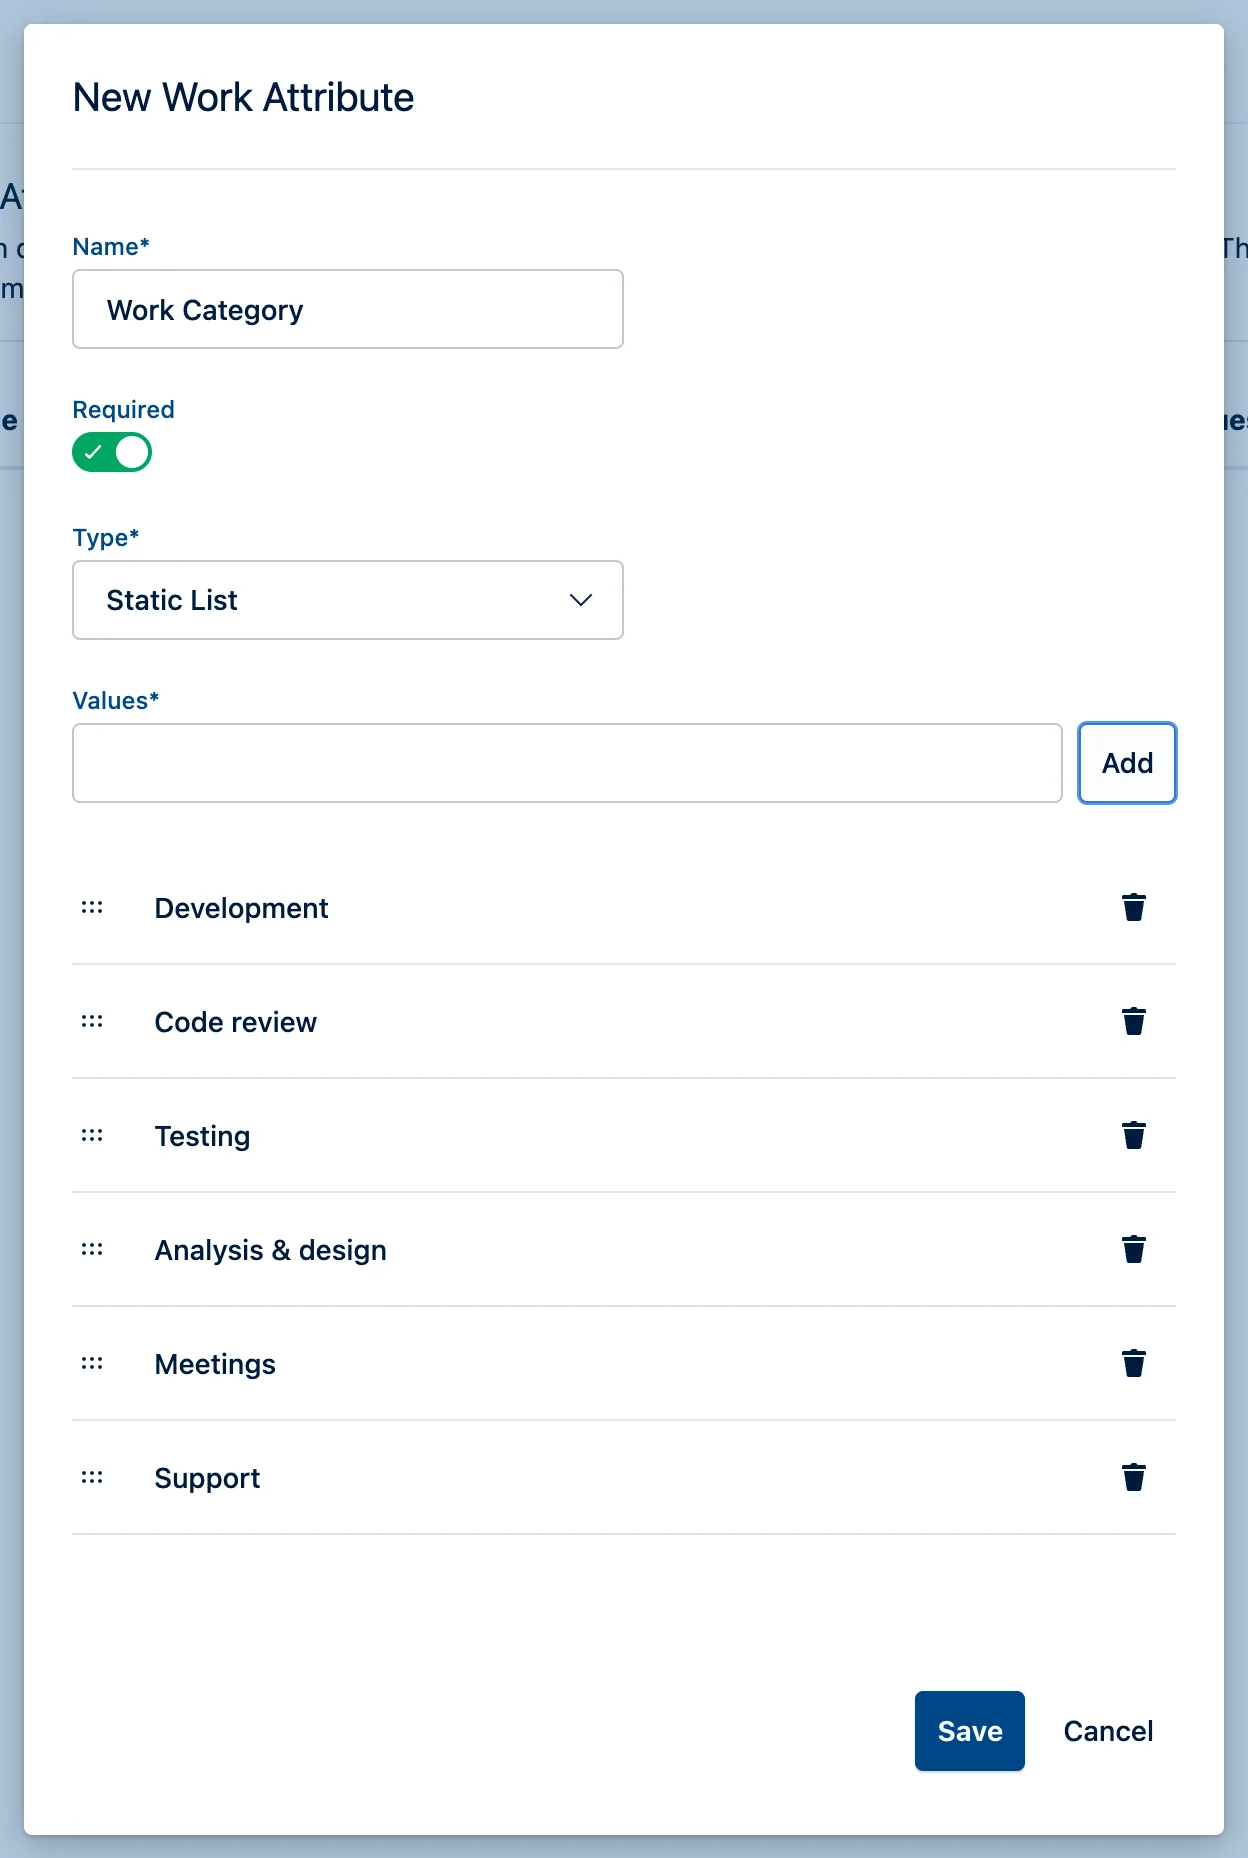
For a Static List you also add the values, one at a time, before saving. The Required toggle is also an important decision here: a required attribute must be filled before a worklog can be saved, which is what makes the resulting data actually complete.
Why you don’t need a “Billable” attribute
In a typical Jira timesheet app, billable is something you invent. You create a checkbox field called “Billable”, you ask everyone to tick it, and you hope they tick it consistently. The flag lives on the worklog and means whatever your team has agreed it means.
If you use accounts to model billable, billability isn’t a property of the worklog, it’s a property of the Account the work is booked to. And accounts are a first-class Tempo concept with a structure behind them:
Accounts (a client engagement, a cost center, an internal project) belong to an Account Category, and every category has a Type. Tempo provides four account types.
Of course, you can still use a “billable” property to model billability. The choice is yours.
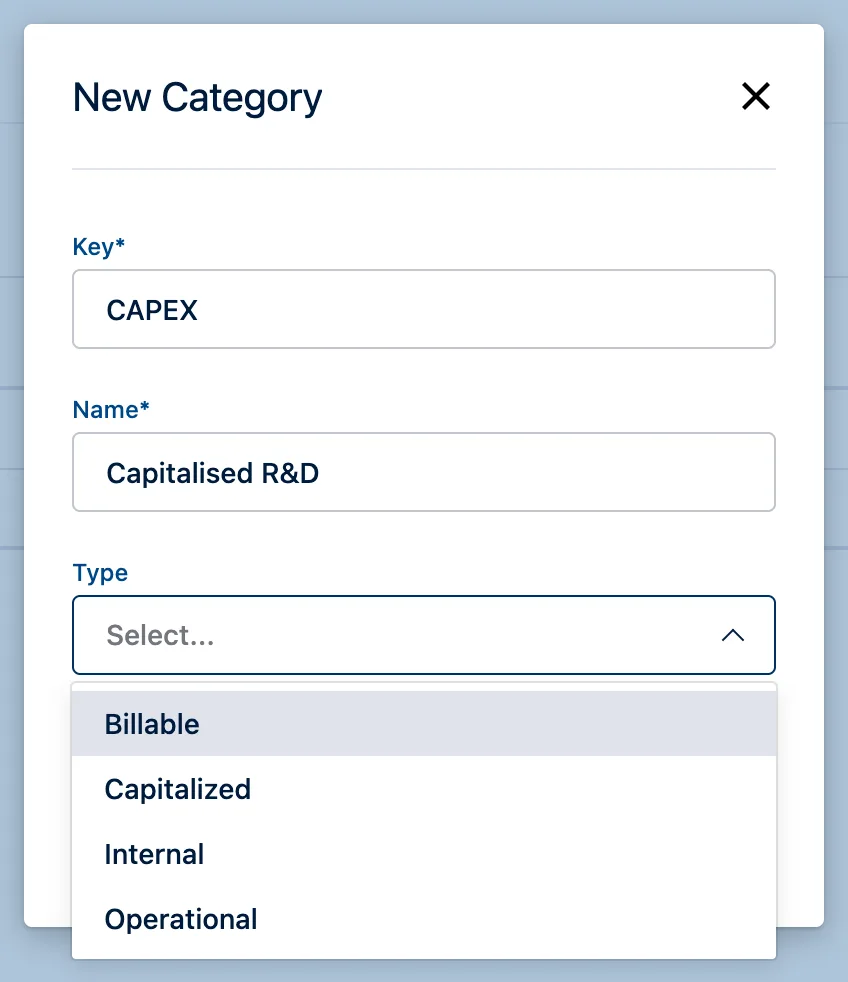
Those four aren’t arbitrary. They’re the distinctions finance actually makes: revenue-generating work, work that can be capitalised, internal overhead, and running-the-business operations. A “Billable? yes/no” checkbox can’t express capitalised R&D, which is exactly the split your finance team cares about at the end of the year.
Set the categories up under Settings → Accounts → Account Categories:

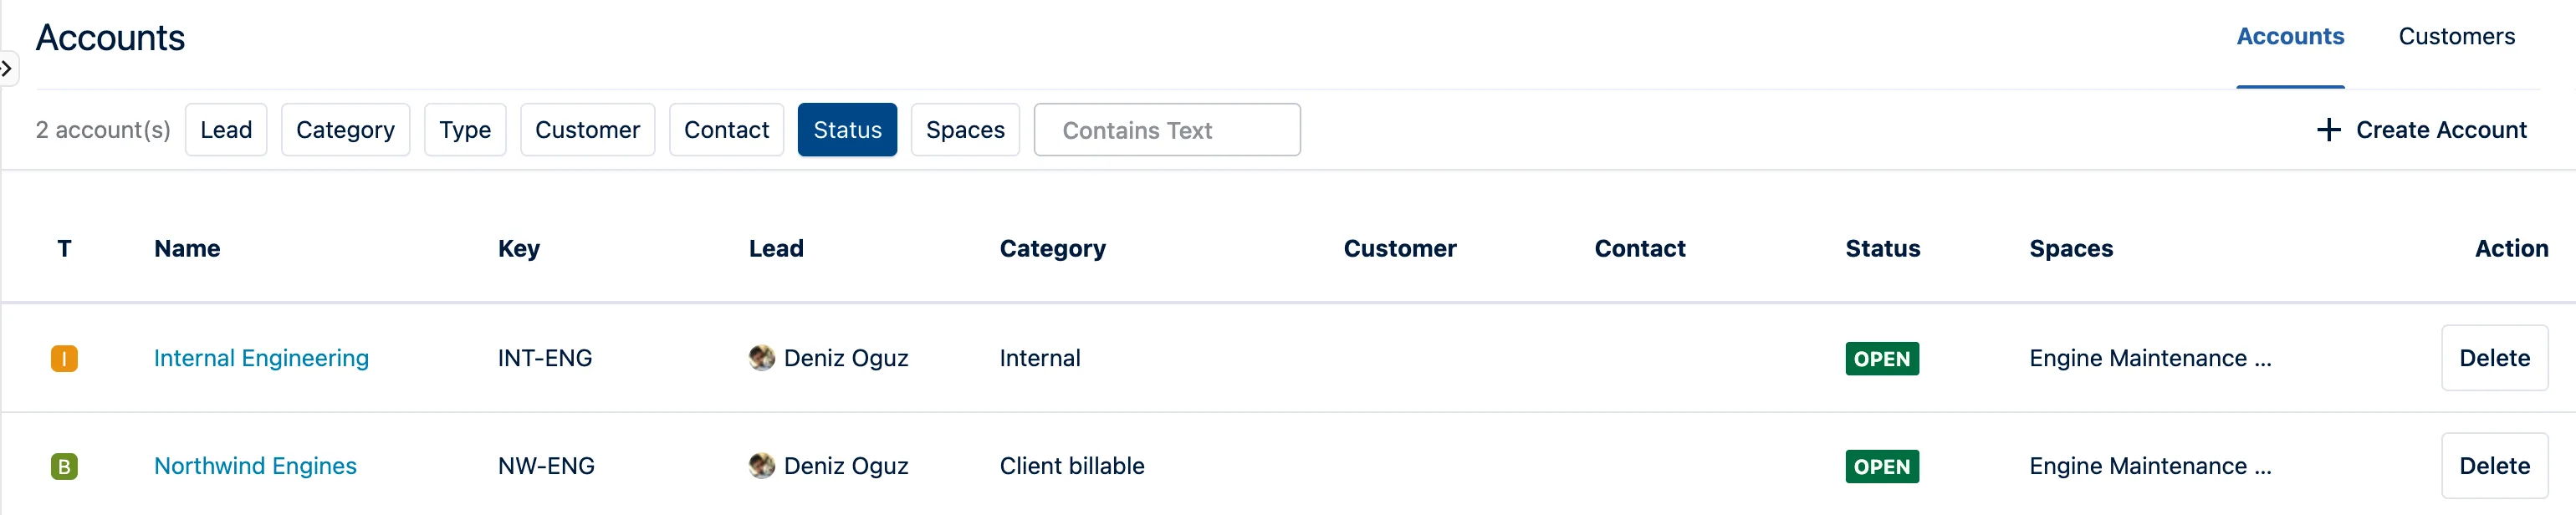
Then create the accounts themselves and link each one to the Jira spaces it applies to. An account needs a lead, and it can span several spaces:
Getting the account onto the worklog
This may not be obvious but creating accounts doesn’t, on its own, put an Account picker in the Log Time form. You add it the same way you add anything else to that form: as a Work Attribute, using the Account type:
Settings → Configuration → Work Attributes → New Work Attribute → Name:
Account, Type: Account
This attribute wires the built-in account model into the logging form. This field is a pointer to a structure Tempo already understands.
Why this beats a checkbox
- It’s filterable. Report filters include Accounts, Account Categories and Category Types. Work Attributes are not filterable (more on that below), so the built-in route gives you something a custom Billable attribute simply can’t.
- Four different options. Billable / Capitalized / Internal / Operational, out of the box.
- Source of truth. Billability is decided once per account, not by every person on every worklog entry.
- Attached to client not to the worklog. Reclassify an account and its whole history reclassifies with it. With a per-worklog checkbox you’d be bulk-editing thousands of rows.
- Reports treat it as first class, including colour-coding the rows by type.
Tempo also has a native Billable hours column. It is a per-worklog number, distinct from logged hours, that exists so you can bill fewer hours than you worked. It is not derived from the account’s category type: it defaults to the full logged duration on every worklog, internal ones included. So if you switch that column on expecting it to reflect billability, it will mirror the Logged column and tell you nothing. Group by Category Type instead; that’s the field carrying the classification.
A starter set that earns its place
Every worklog attribute is extra information to provide by everyone logging work. Start with as few worklog attributes as possible.
| Attribute | Type | Required | What it answers |
|---|---|---|---|
| Work Category | Static List | Yes | What kind of effort was this? |
| Account | Account | No | Who is this work for, and is it billable? |
| Invoice Number | Input Field | No | Which invoice do these hours belong on? |
| Travel Distance (km) | Numeric Input Field | No | How much travel is this engagement costing? |
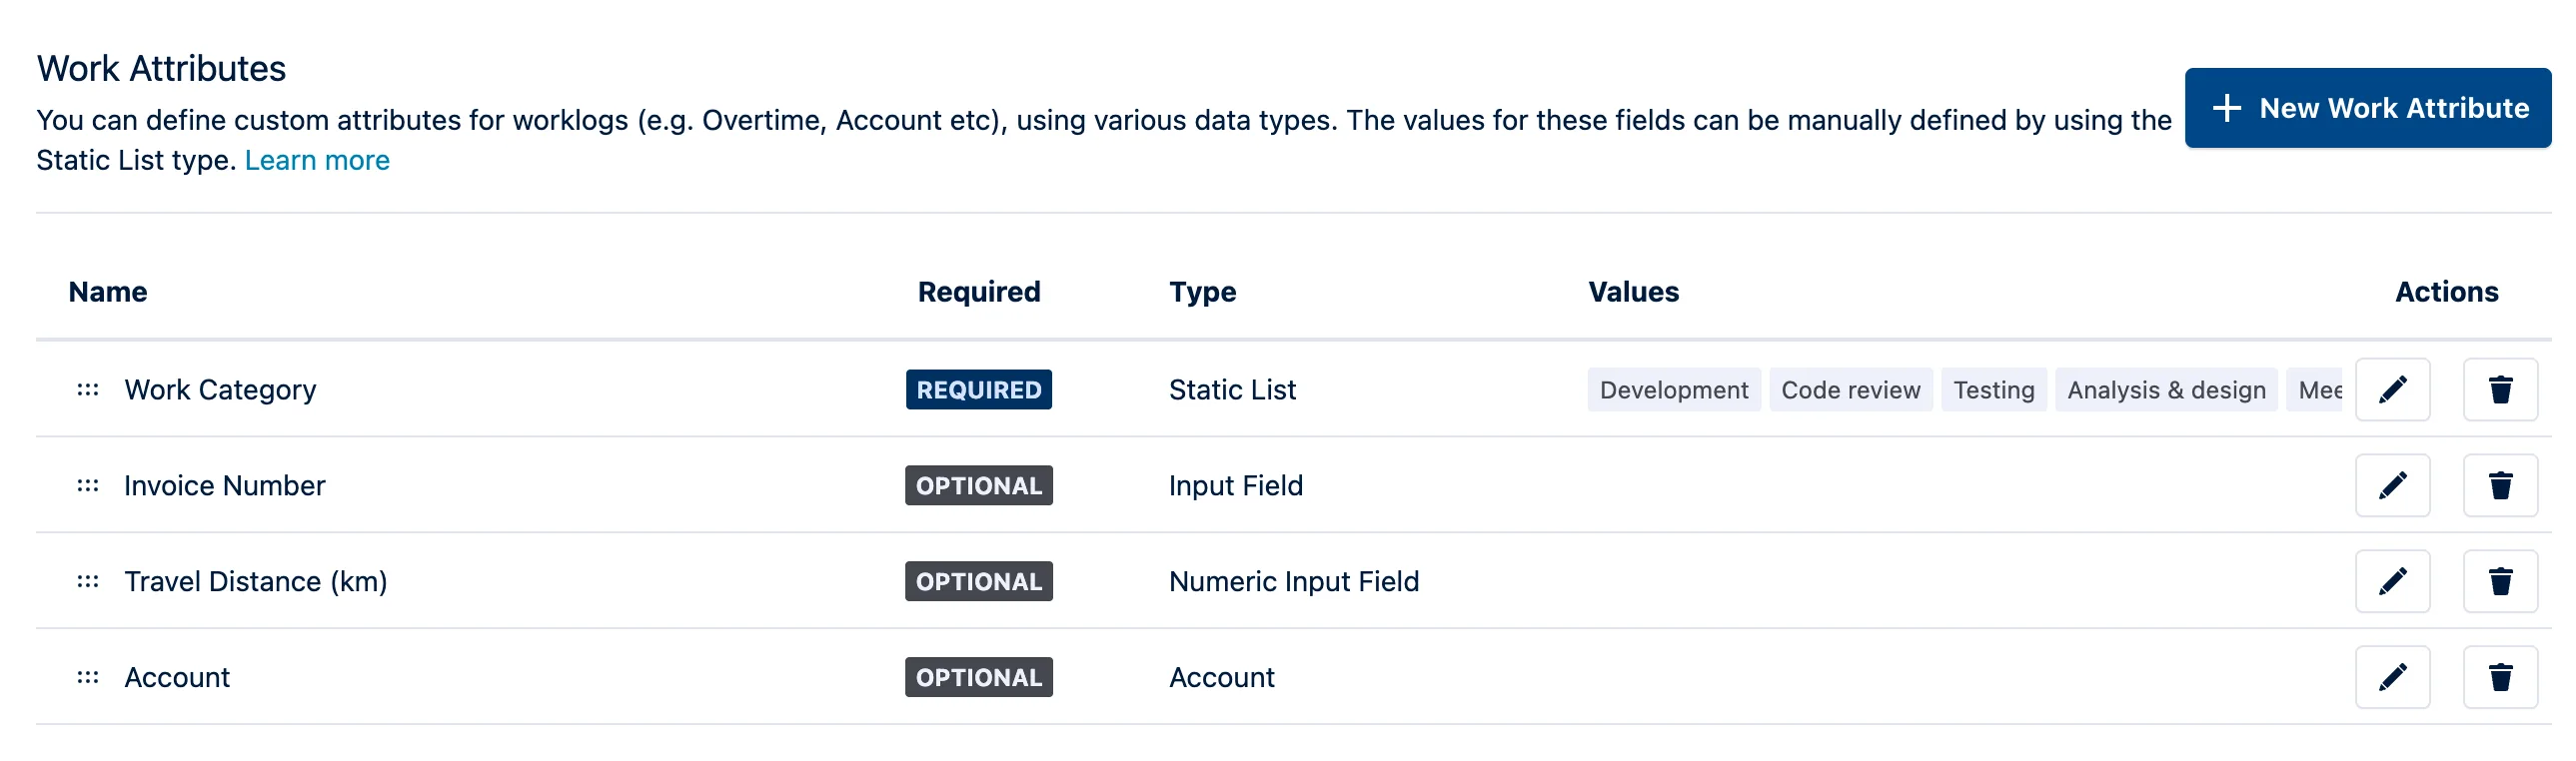
Restraint matters more than coverage. Every attribute is another field on a form people fill in several times a day, and an attribute that’s half-completed is worse than no attribute at all, because it produces reports that look authoritative. Make the one or two that drive decisions required, and leave the rest optional.
Logging time with attributes
Attributes appear in the Log Time dialog under the standard fields. By default, Tempo shows required attributes inline and hides the optional ones behind a Show hidden fields link. That keeps the form short, but it also means optional attributes are easy to miss.
Each user may configure the list of fields shown by default using the setting on the “Log Time” dialog.
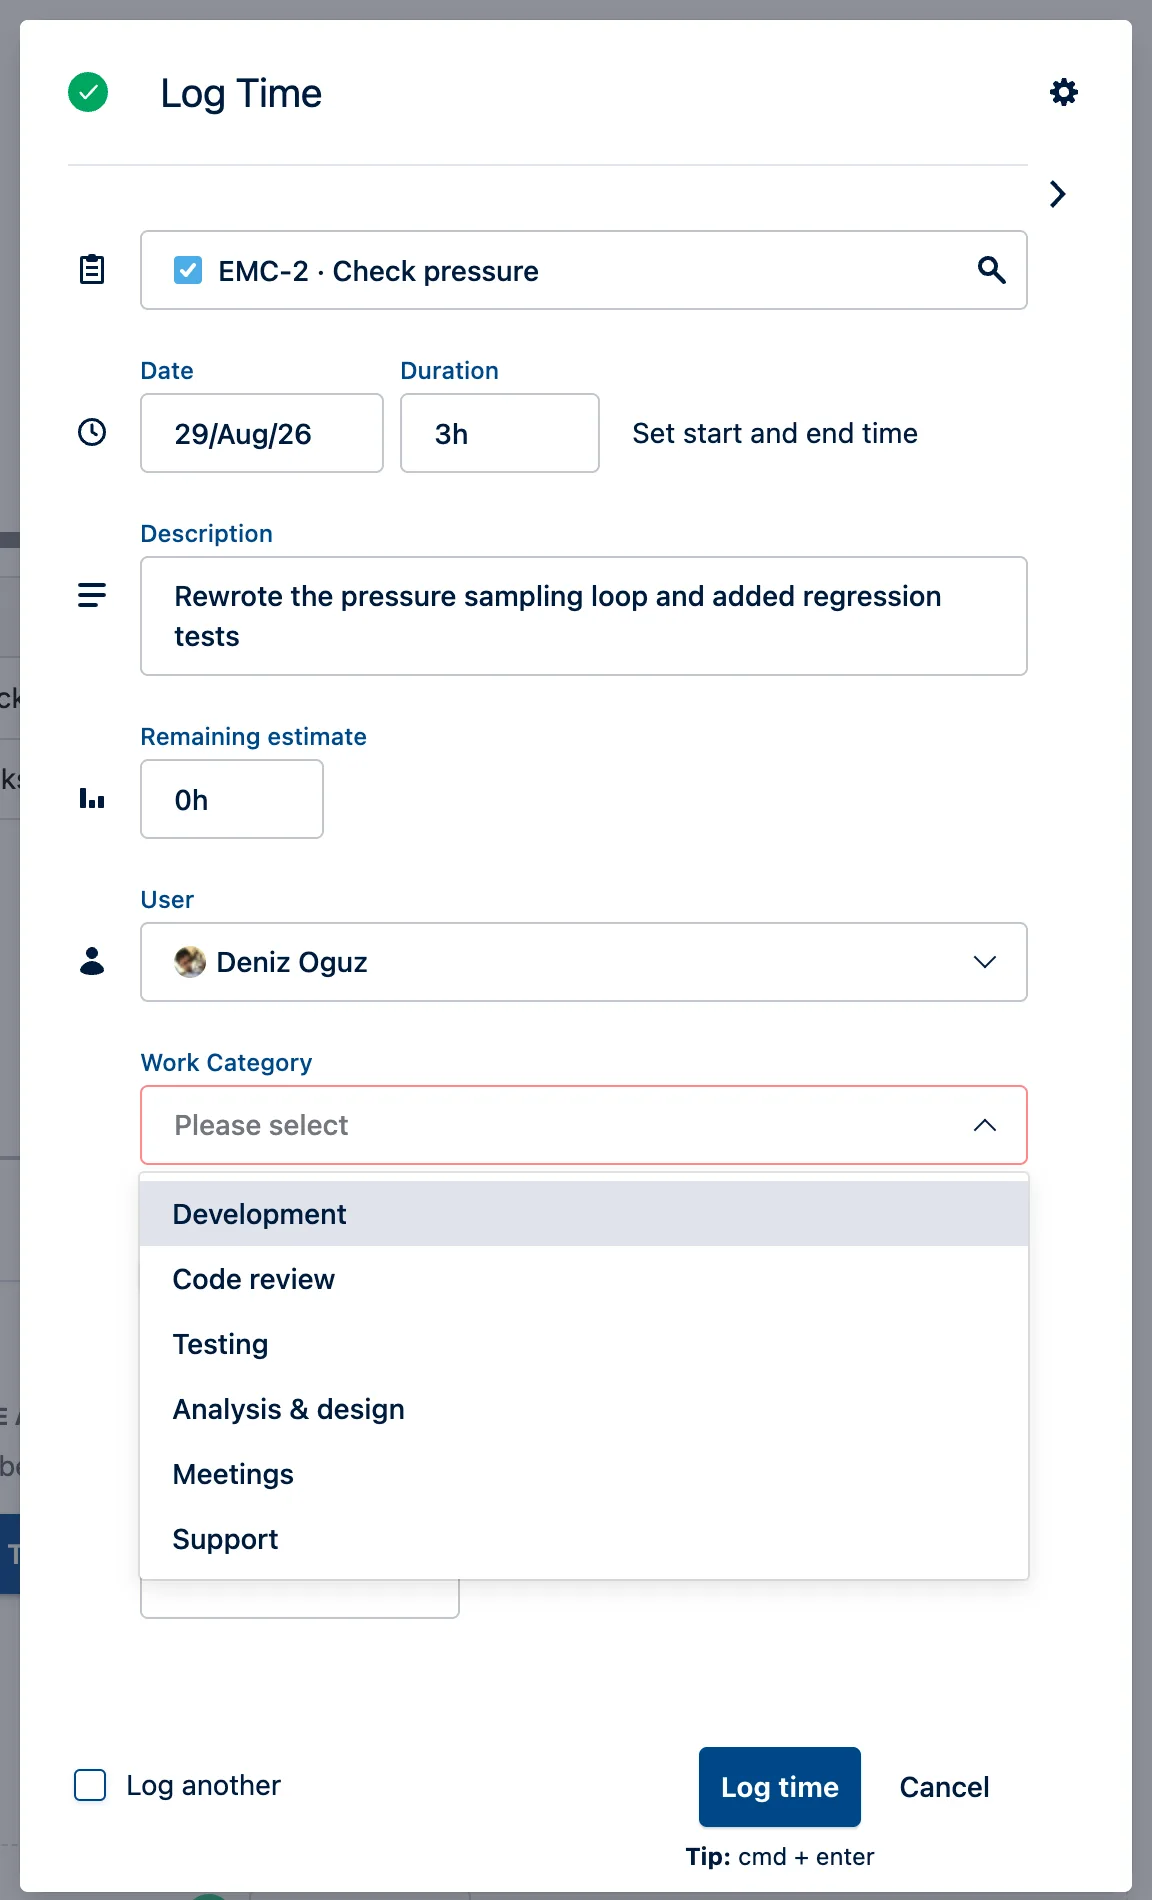
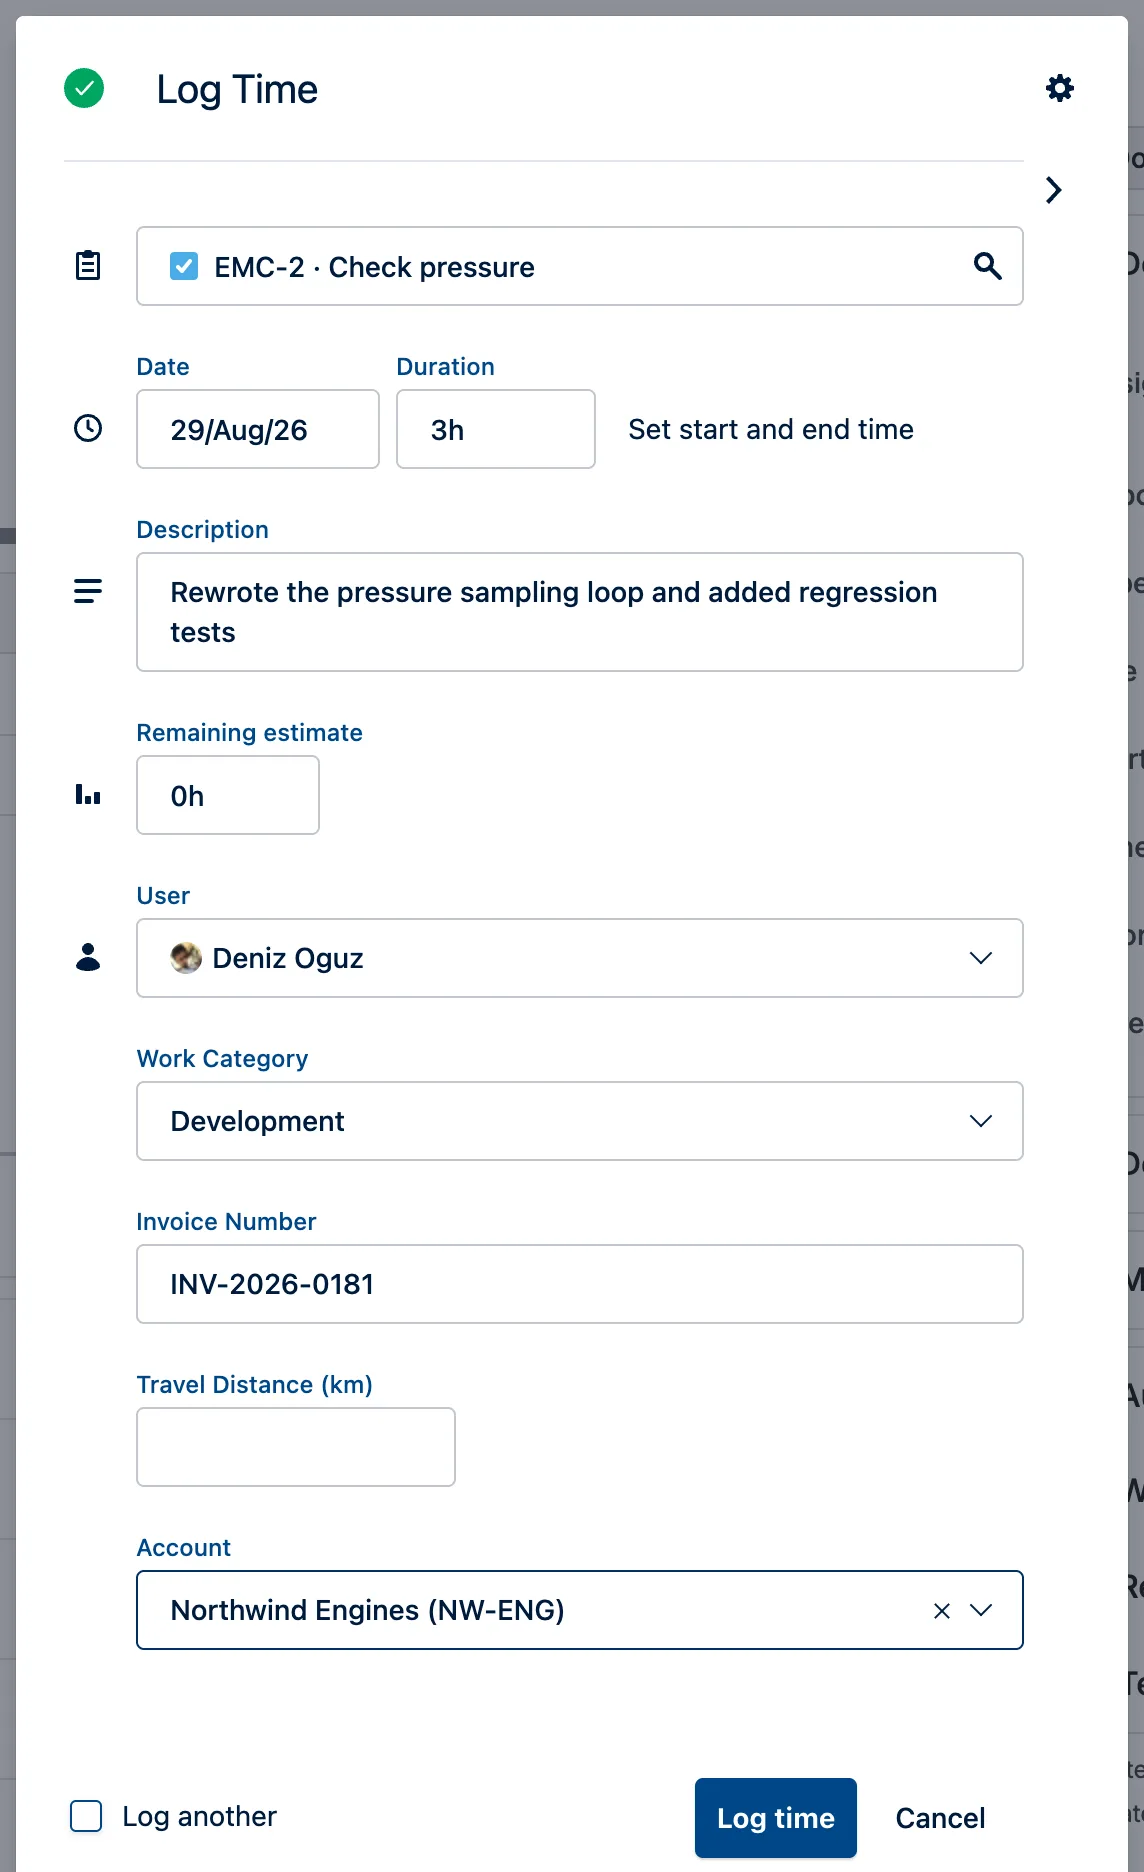
Expand the hidden fields and the full set is there, including the Account picker, which searches the accounts linked to that work item’s space:
Once saved, the worklog shows up in the Tempo panel on the issue, in the Worklogs / Plans tab:
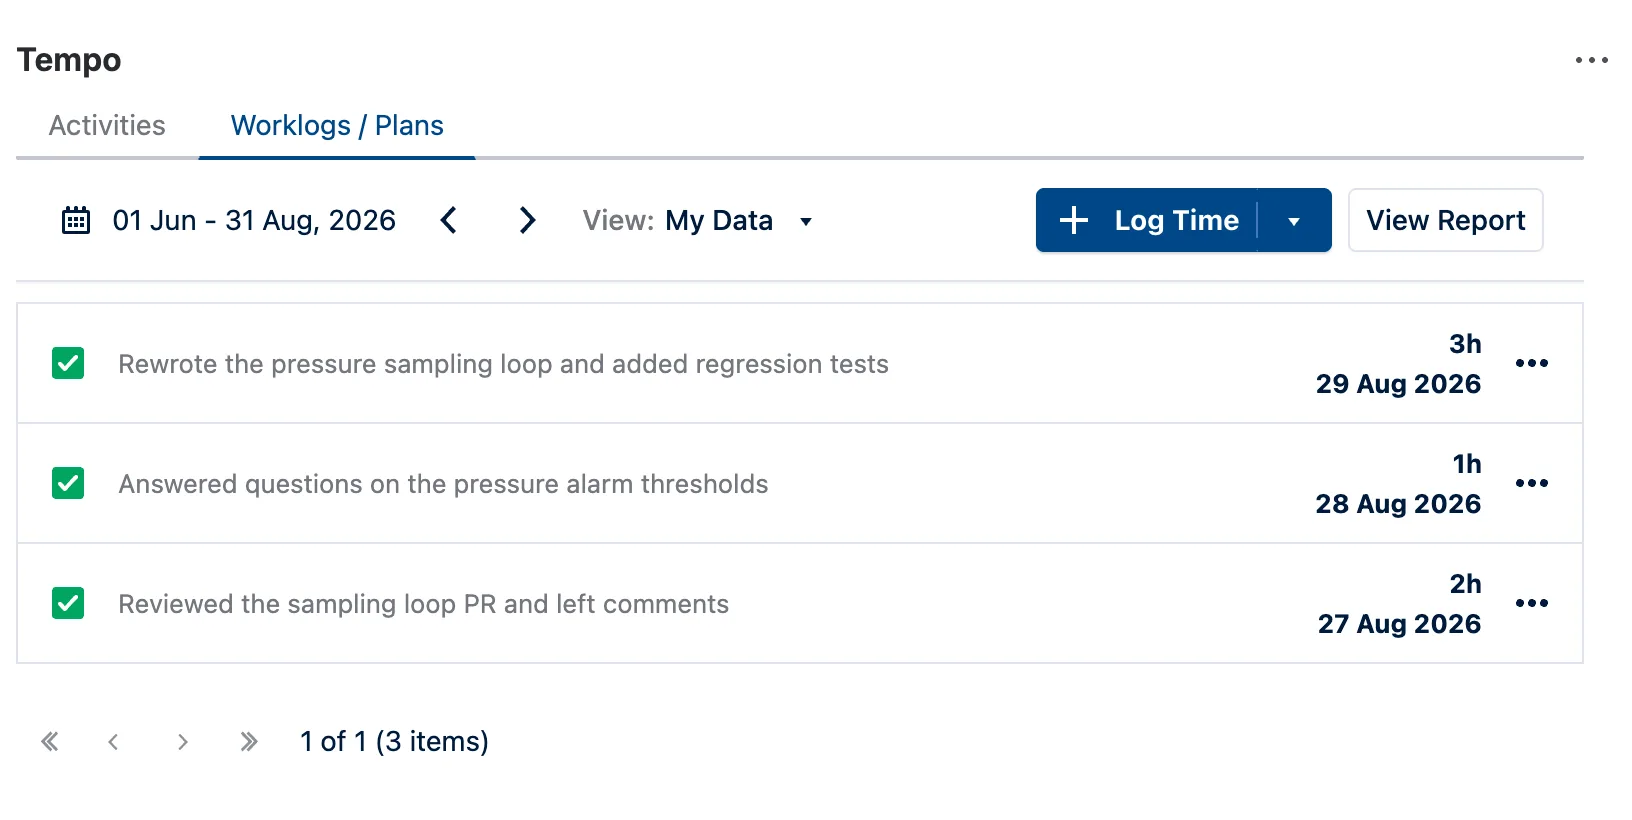
Tempo panel doesn’t show attributes and their values. The issue panel is a compact list of description, duration and date. To see or change an attribute you open the worklog from its … menu, or you go to a report.
Where it pays off: reports
In Tempo → Reports → Logged Time, everything you’ve set up becomes available in two places.
As a grouping dimension
Open the Group By picker. Your custom attributes are listed under their own Work Attributes heading:
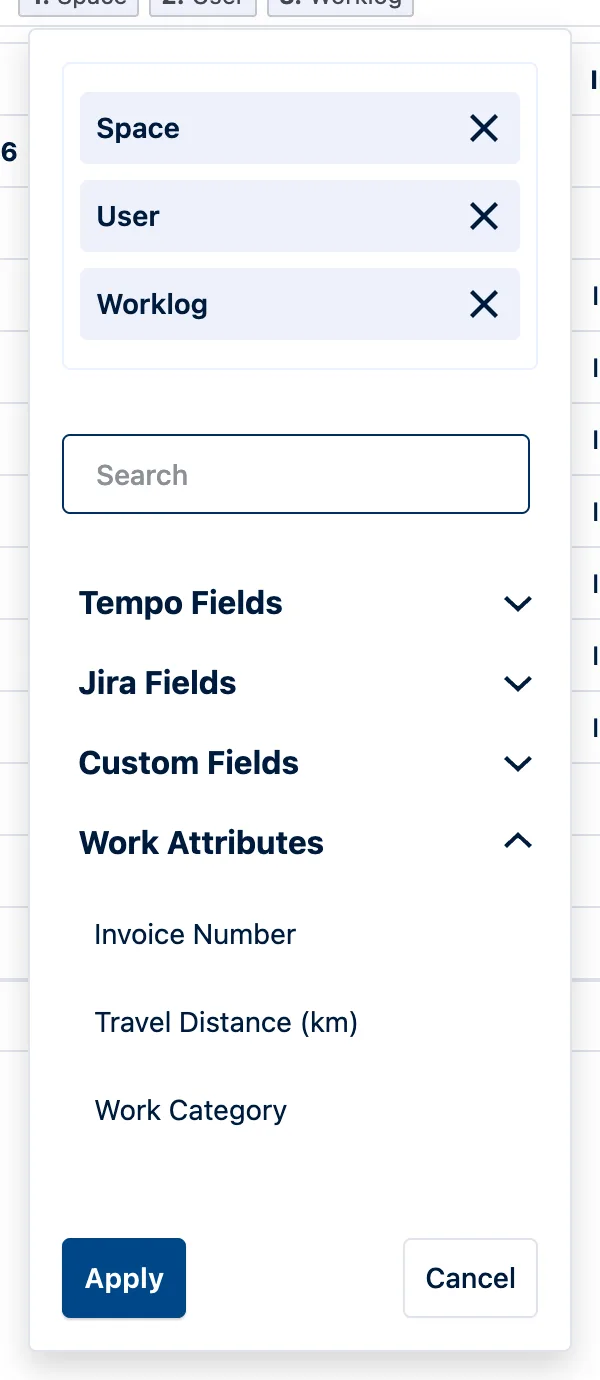
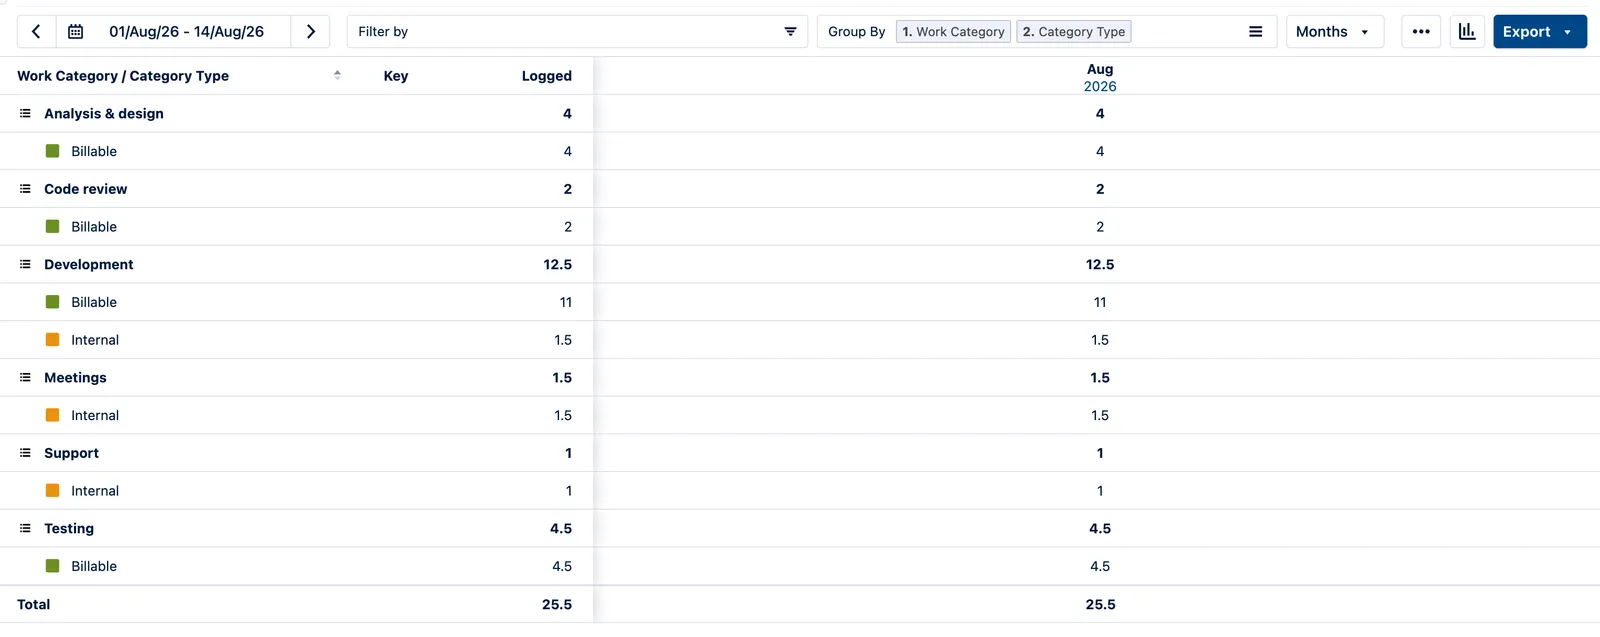
Stack a custom attribute with a built-in one and you get a nested breakdown with subtotals at every level. Group by Work Category → Category Type and the question “how much of this fortnight was rework, and how much of it could we bill?” answers itself:
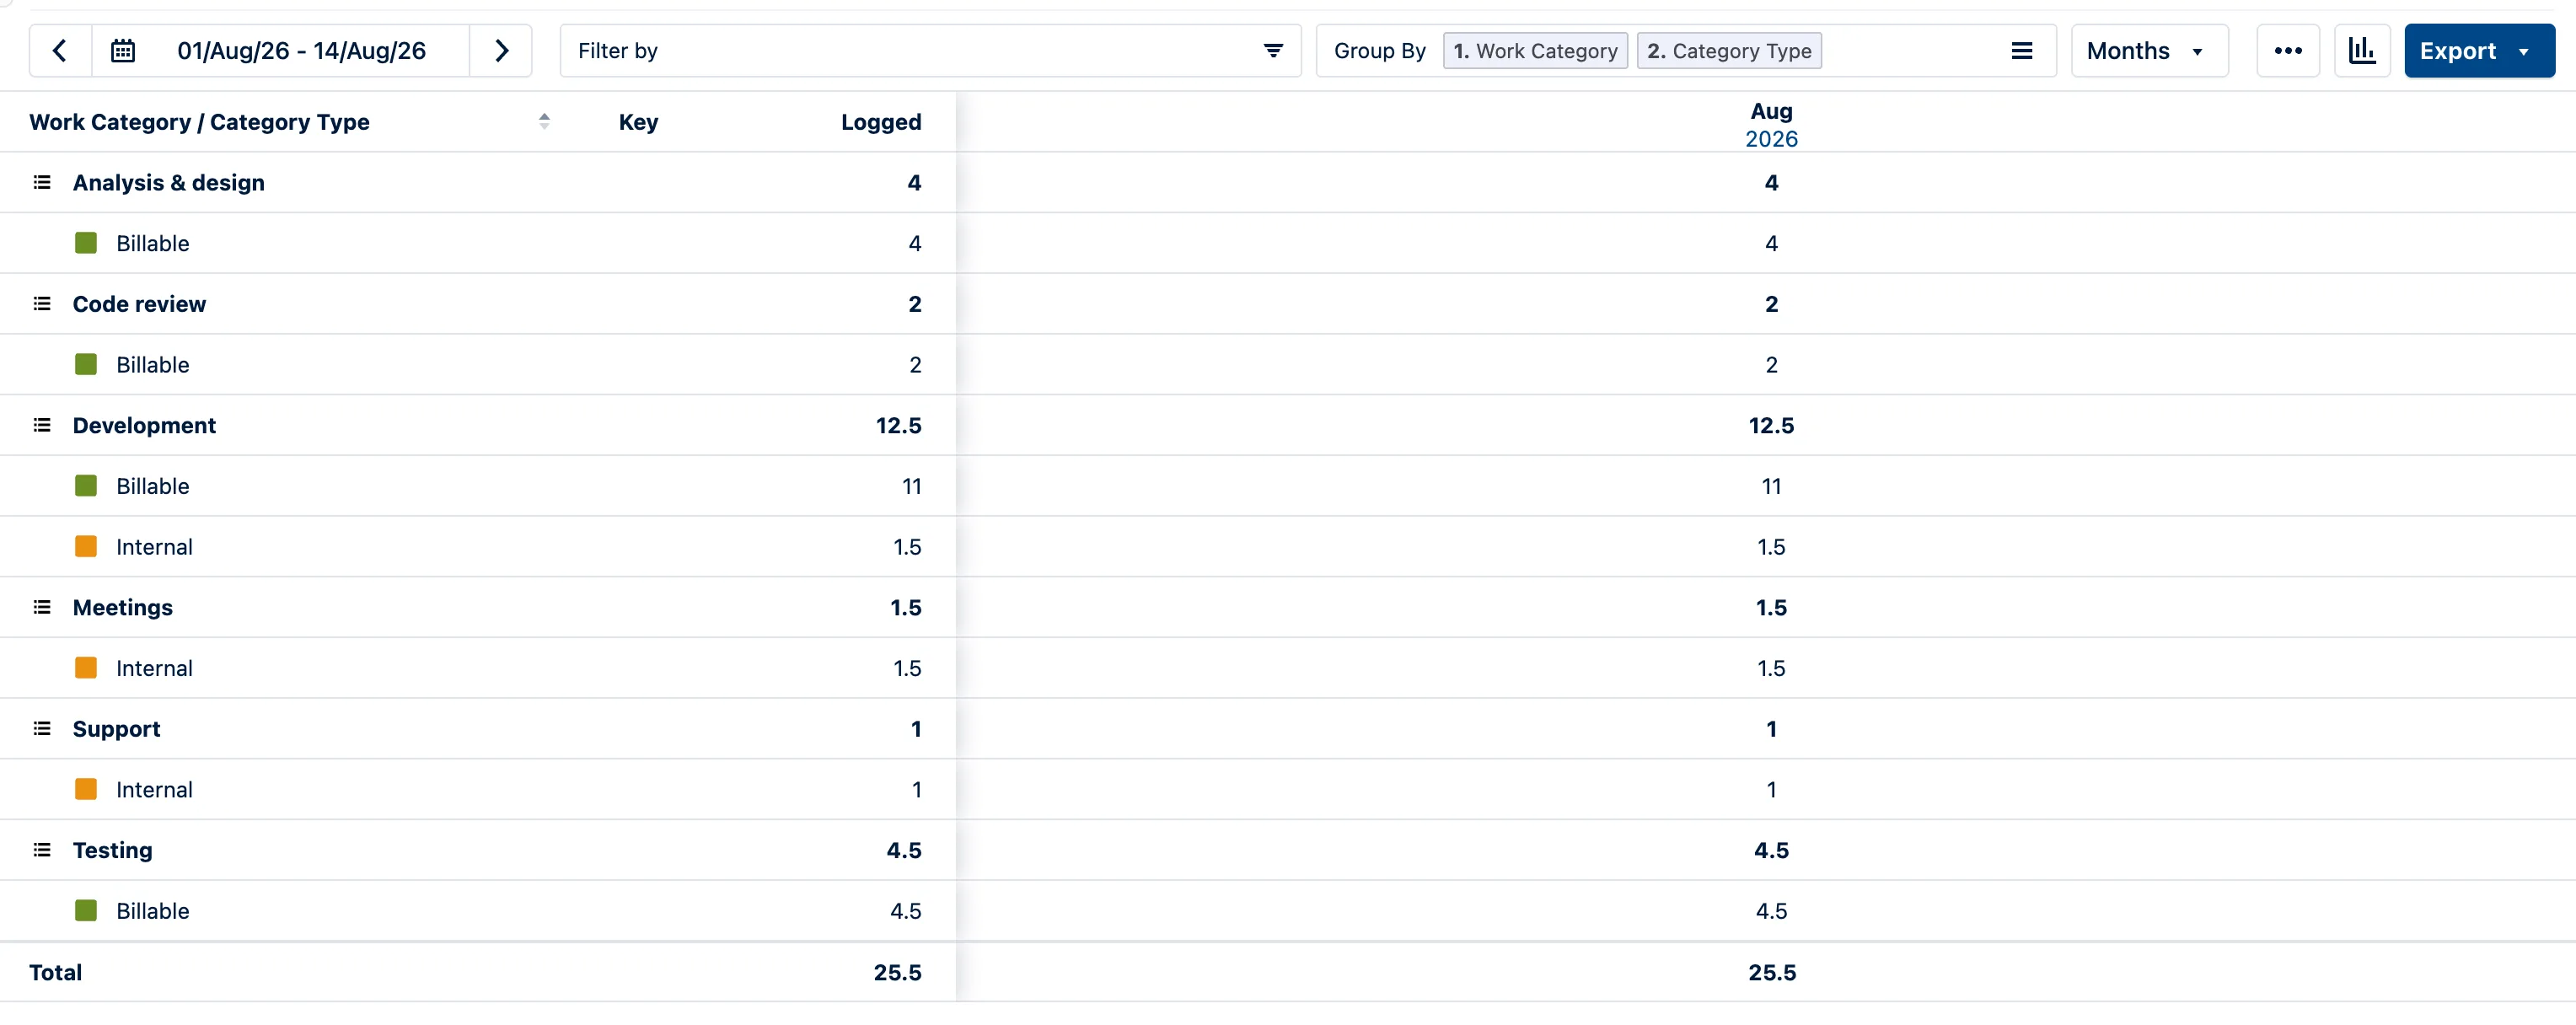
A simple custom checkbox would not provide that color coding, which comes from the account’s built-in type.
As report columns
The view selector (the button reading Days by default) includes Days, Weeks, Months and Quarters. Scroll down to find a Work Attributes section that turns each attribute into a column. Switch the view to Overview, add Worklog as the deepest grouping level, and you get a worklog-by-worklog table with the classification alongside the hours:
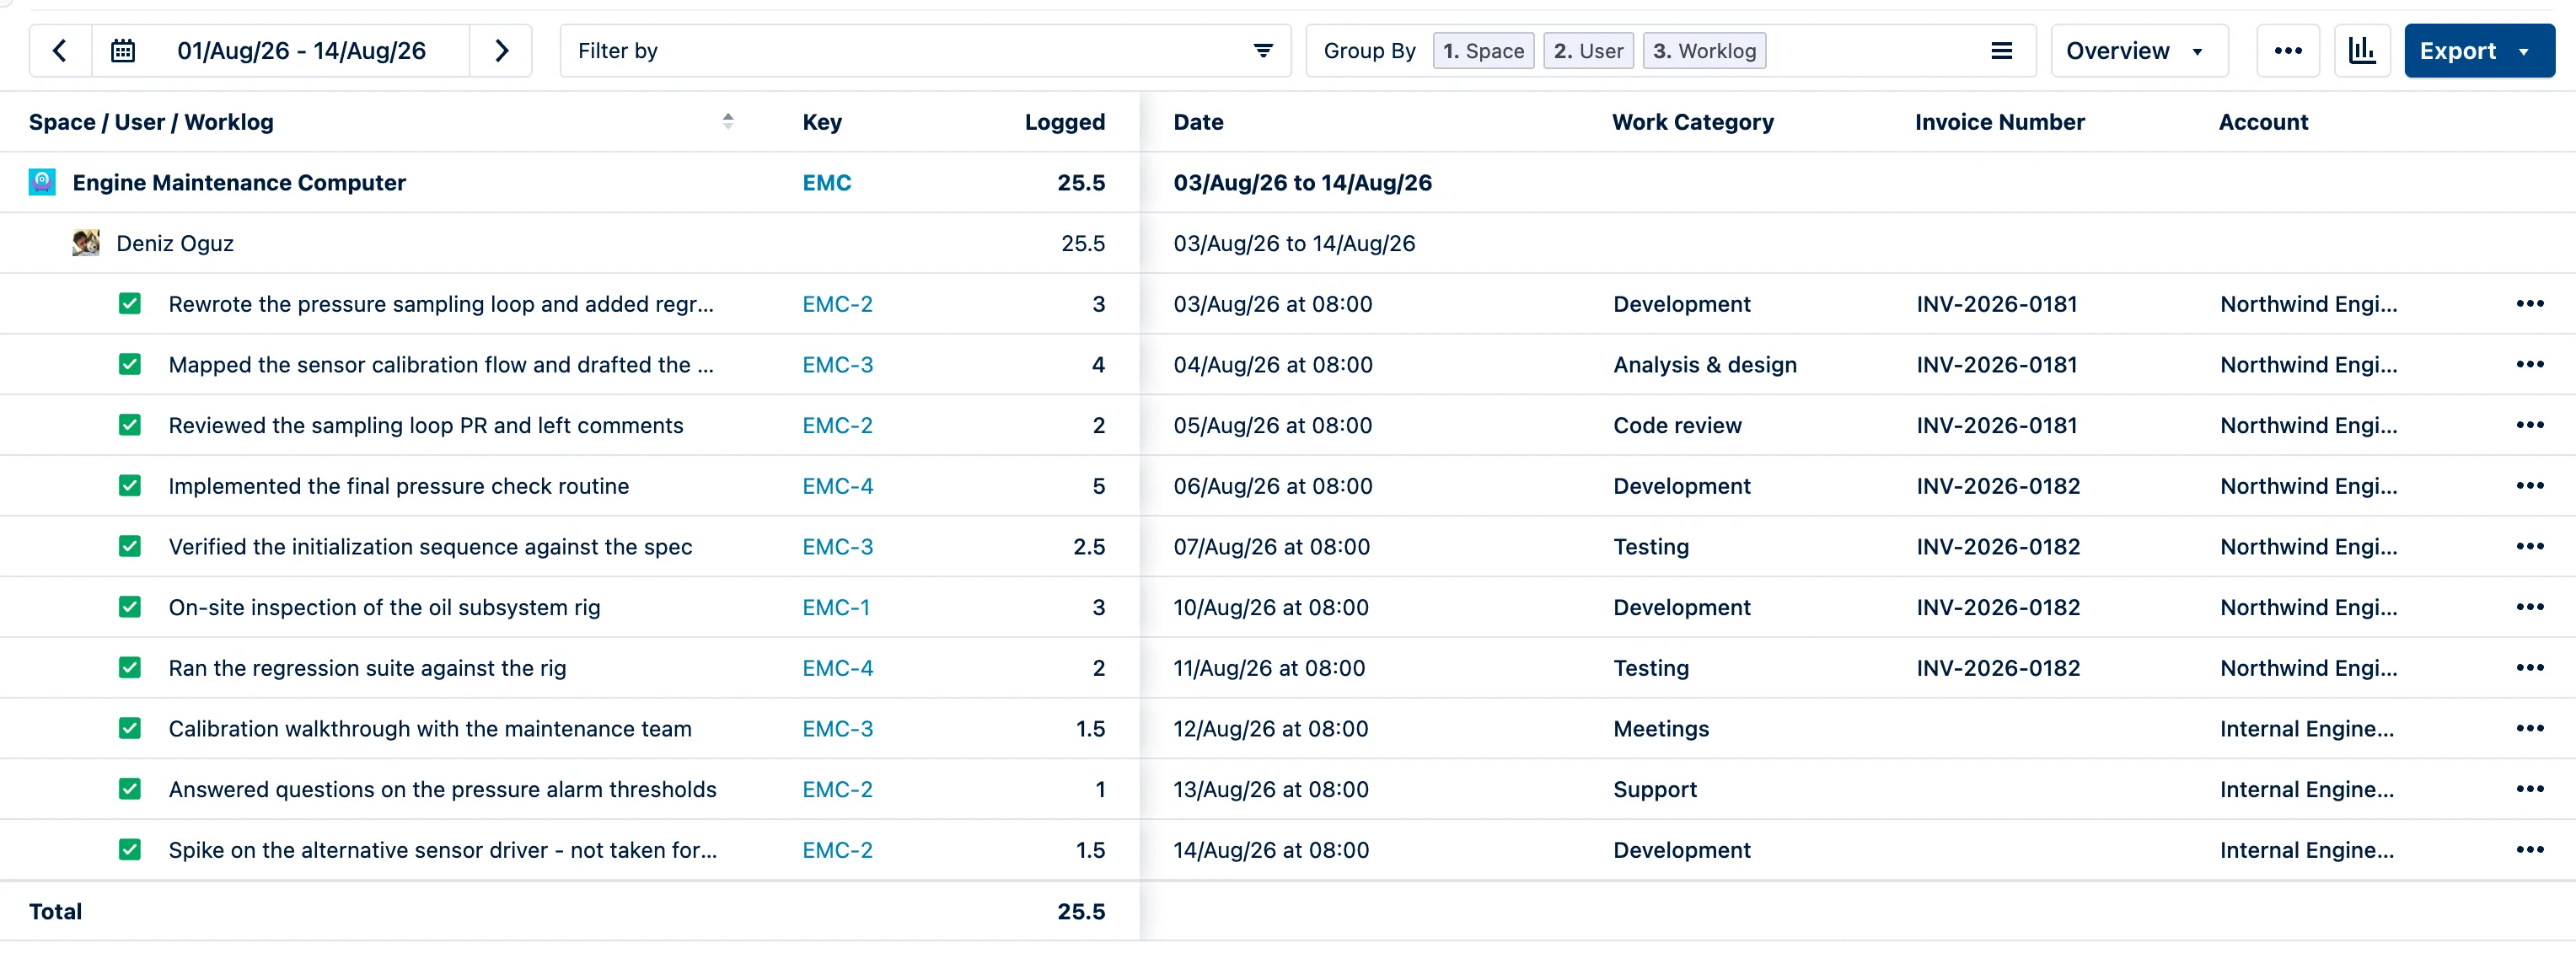
If you export this table, columns are also exported.
Two limits worth planning around
Custom attributes aren’t filters. The report’s Filter by panel covers Spaces, Teams, Roles, Accounts, Account Categories, Category Types, Customers, Epics, Work Items, Users, Jira filters and Jira labels, but not Work Attributes. You can group by Work Category and read the subtotals; you can’t filter the report down to just the Testing rows and work from there. Note what is on that list, though: accounts, categories and category types all are. That’s the practical argument for putting billability on the account rather than in a field you invent. It isn’t a rule about built-in versus custom, though. Jira labels are yours and they filter fine, and Tempo’s own Work Item Type Categories are built in and don’t. Filtering on attributes is simply a request Tempo hasn’t shipped, open since 2020.
Existing worklogs stay empty. An attribute created today applies from today. Every worklog logged before it existed has no value, and in a report grouped by that attribute they collect in an unnamed group at the top. That’s not a bug, but it does mean the first month of any new attribute is a mix, so pick a clean starting date and say so to the team.
The payoff
By tracking hours, you can understand capacity. With classified hours, you can also understand what the time went into, who it was for, whether it earns revenue, and which invoice it belongs on.
Start with two things: the Account attribute, so billability comes from a structure rather than a habit, and one Static List for the kind of work you do. Make that second one required. Give it a month, run the grouped report. If your team has additional questions you can’t answer with the existing attributes, then add new ones.
Comparing your options? We’ve written the same walkthrough for custom worklog attributes in WorklogPRO, and a broader guide to choosing a Jira time-tracking app.