Configuration
Custom Worklog Attributes in Jira: Capture the Data Your Reports Actually Need
A Jira worklog captures two things: how long you worked and, if you bothered, a comment. That’s it. So the moment someone asks a sharper question (Is this billable? What kind of work was it? Which invoice does it belong to? Was it overtime?), the worklog has no answer, and you’re back to guessing or grepping through free-text comments.
Custom worklog attributes are how WorklogPRO closes that gap. They let you attach your own structured fields to every worklog, so the metadata you actually report on travels with the time, captured at the moment of logging, not reconstructed later.
What a worklog attribute is
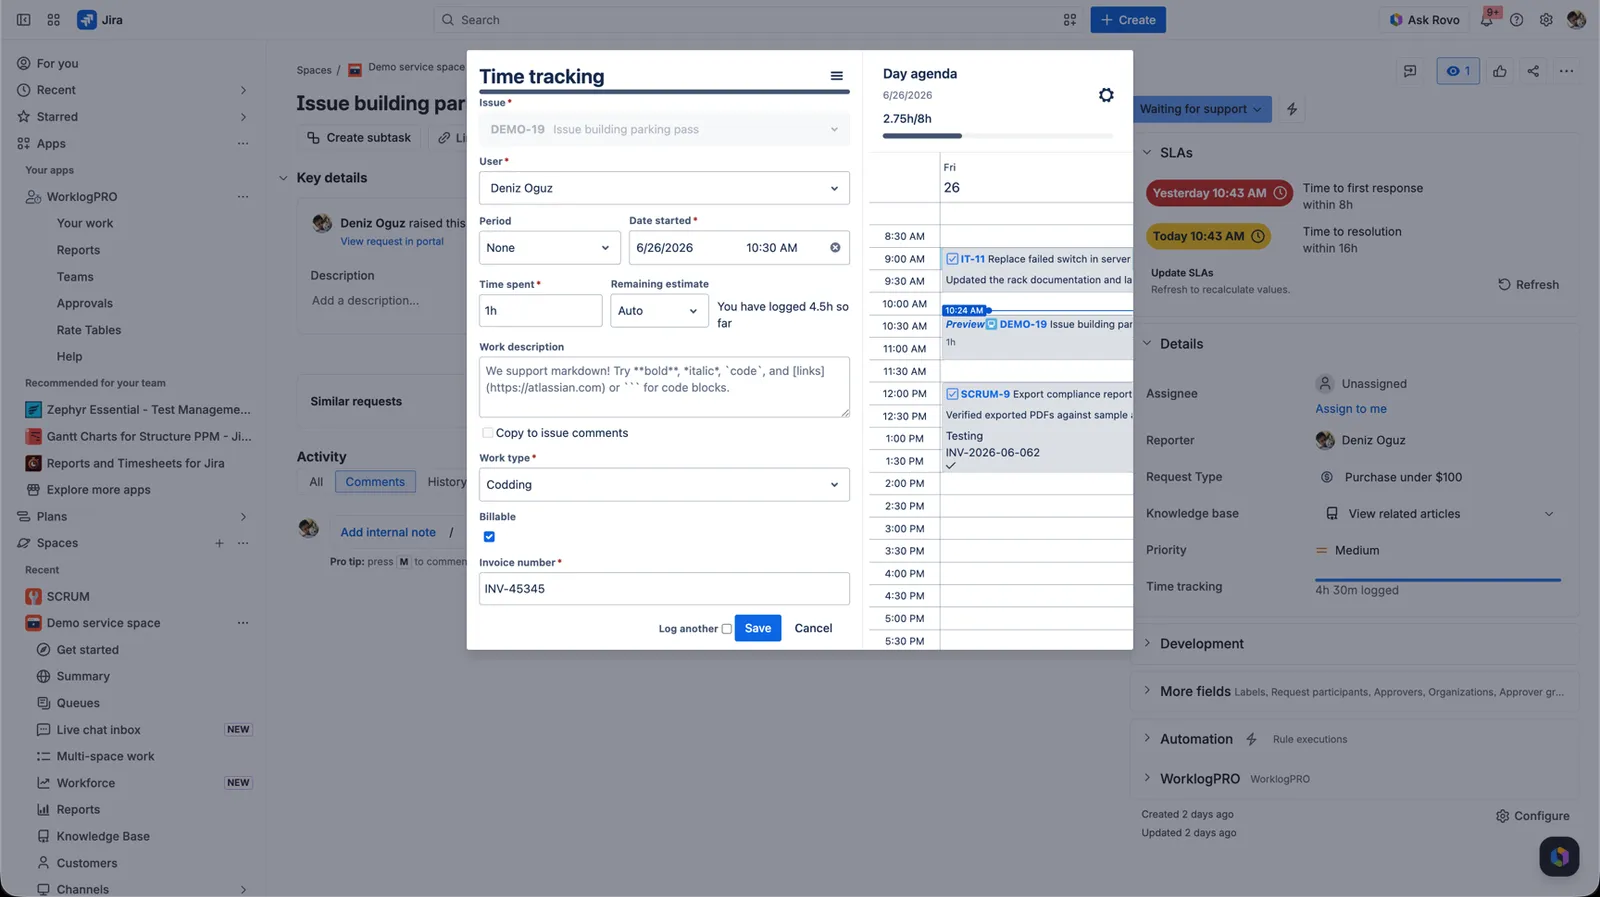
A worklog attribute is a custom field that appears in WorklogPRO’s Log Work dialog, right alongside time and description. You define the attributes your business cares about; everyone fills them in as they log work.
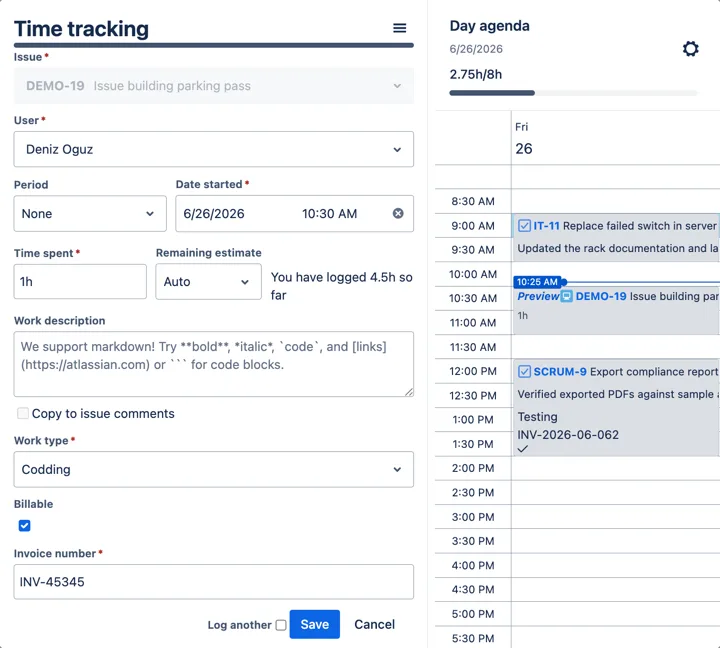
Attributes aren’t built-in. That’s the point. They’re yours. Each one has a name, a type (WorklogPRO calls it the attribute’s Category), and can be required so people can’t skip it. There are six types to cover the obvious shapes of data:
- Single Select: a dropdown with a fixed list of options. Great for a Work type (Development, Testing, Analysis…), because everyone picks from the same values and your reports stay clean.
- Boolean: a yes/no checkbox. The classic example is Billable.
- Text: free input for things like an Invoice number or a reference code.
- Integer, Decimal, and Duration: for numeric or time-based values, when an attribute needs to hold a number rather than a label.
A few attributes that earn their place
You don’t need many. A handful of well-chosen attributes will answer most of the questions a timesheet can’t:
- Work type (dropdown): separates the kind of effort: build vs. test vs. analysis. Suddenly you can see how much of a project went to rework.
- Billable (checkbox): the single most valuable flag for any client-facing team: revenue-generating time vs. everything else.
- Invoice number (text): ties hours to the invoice they were billed on, so finance can reconcile without a spreadsheet.
- Overtime (checkbox): turns “are people burning out?” from a hunch into a number you can filter on.
The right set is whatever your reports keep asking for. If a question comes up every month-end, it probably wants to be an attribute.
Where attributes pay off #1: reports that answer real questions
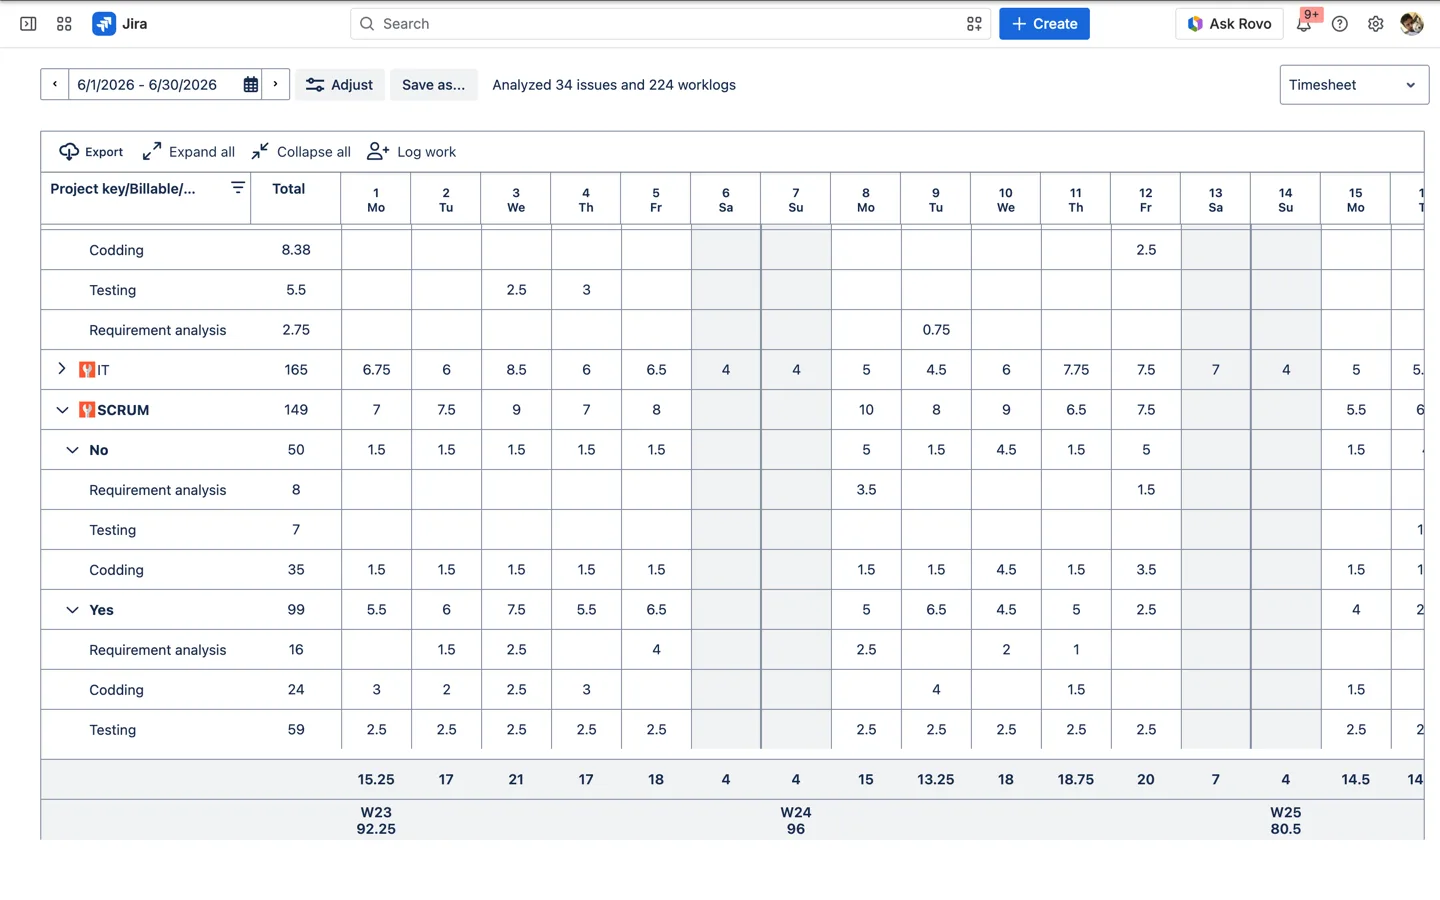
Once time is tagged, every attribute becomes a dimension you can group, pivot, and chart by. In a report’s group picker your attributes appear under their own Attributes heading (marked with a (WP) suffix), so you can stack them into multi-level groups alongside built-in dimensions. Group by Project → Billable → Work type, for example, and the Timesheet view nests them with subtotals at every level: each project split into billable vs. non-billable, then by the kind of work.
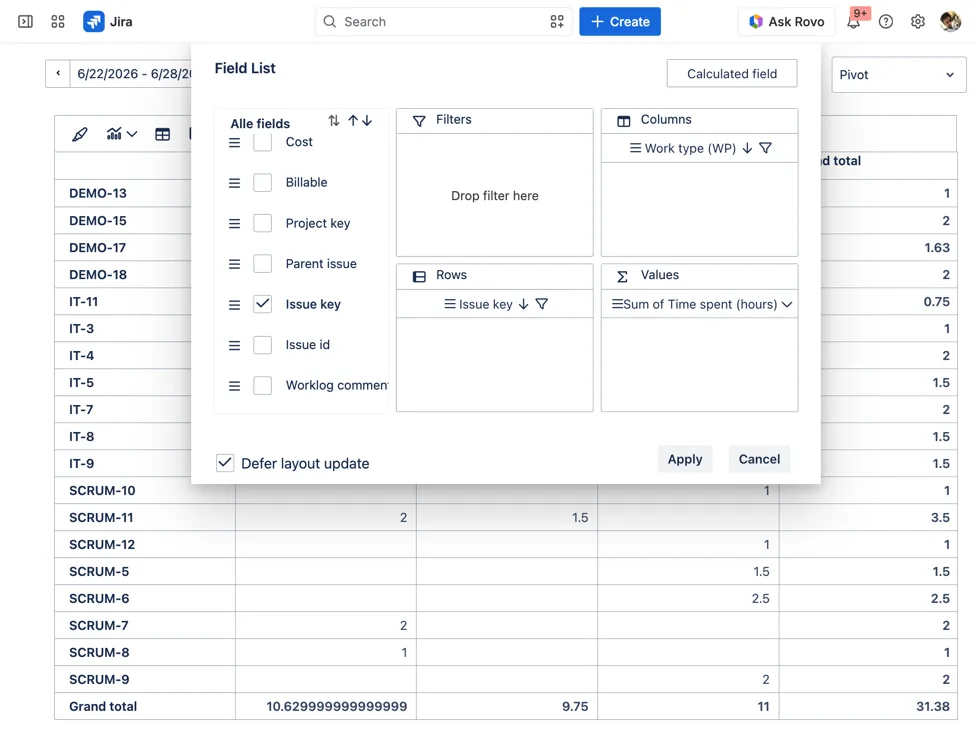
Prefer a cross-tab? Drop Work type into a Pivot’s columns and read effort by activity across every project; group by your Billable flag to split revenue work from the rest.
The same applies to the Chart view: group the bars by an attribute to see where effort and money go. Attributes are what make WorklogPRO reports answer questions specific to your business rather than generic hours-by-issue. (For the full reporting tour, see worklog reports that actually help.)
Where attributes pay off #2: rates that depend on the work
Attributes don’t just describe time. They can price it. WorklogPRO’s rate tables let a rule’s conditions match on an attribute value, so the rate adjusts to the kind of work automatically.
Open a rate table’s Rules, click Add rule, set a Rate ($/hr), and add a Condition. The condition types are User, Project, and Attribute, each available as equals or in a list. Choose Attribute → Work type and the rate applies to exactly that kind of work.
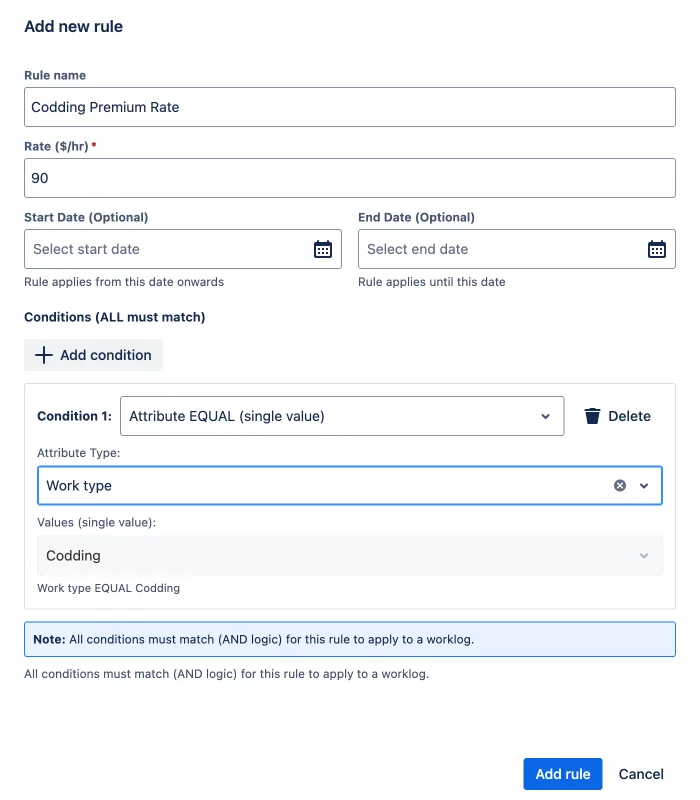
So a cost rule can make Codding cost more than Testing, or a billable rule can charge a premium for a particular Work type: no manual tagging after the fact, because the attribute was captured when the work was logged. Conditions are ANDed together, and rules are evaluated in order, first match wins. Combined with rules on user and project, your whole rate card becomes self-applying.
Group right on the issue, too
Attribute grouping isn’t only for big reports. On any issue, open the Work log (WP) tab and you get a grid of that issue’s worklogs with a column for every attribute: Work type, Billable, Invoice number, and the rest. Drag a column header onto the “Drag a column here to group” bar and the entries regroup instantly, with a subtotal per value.
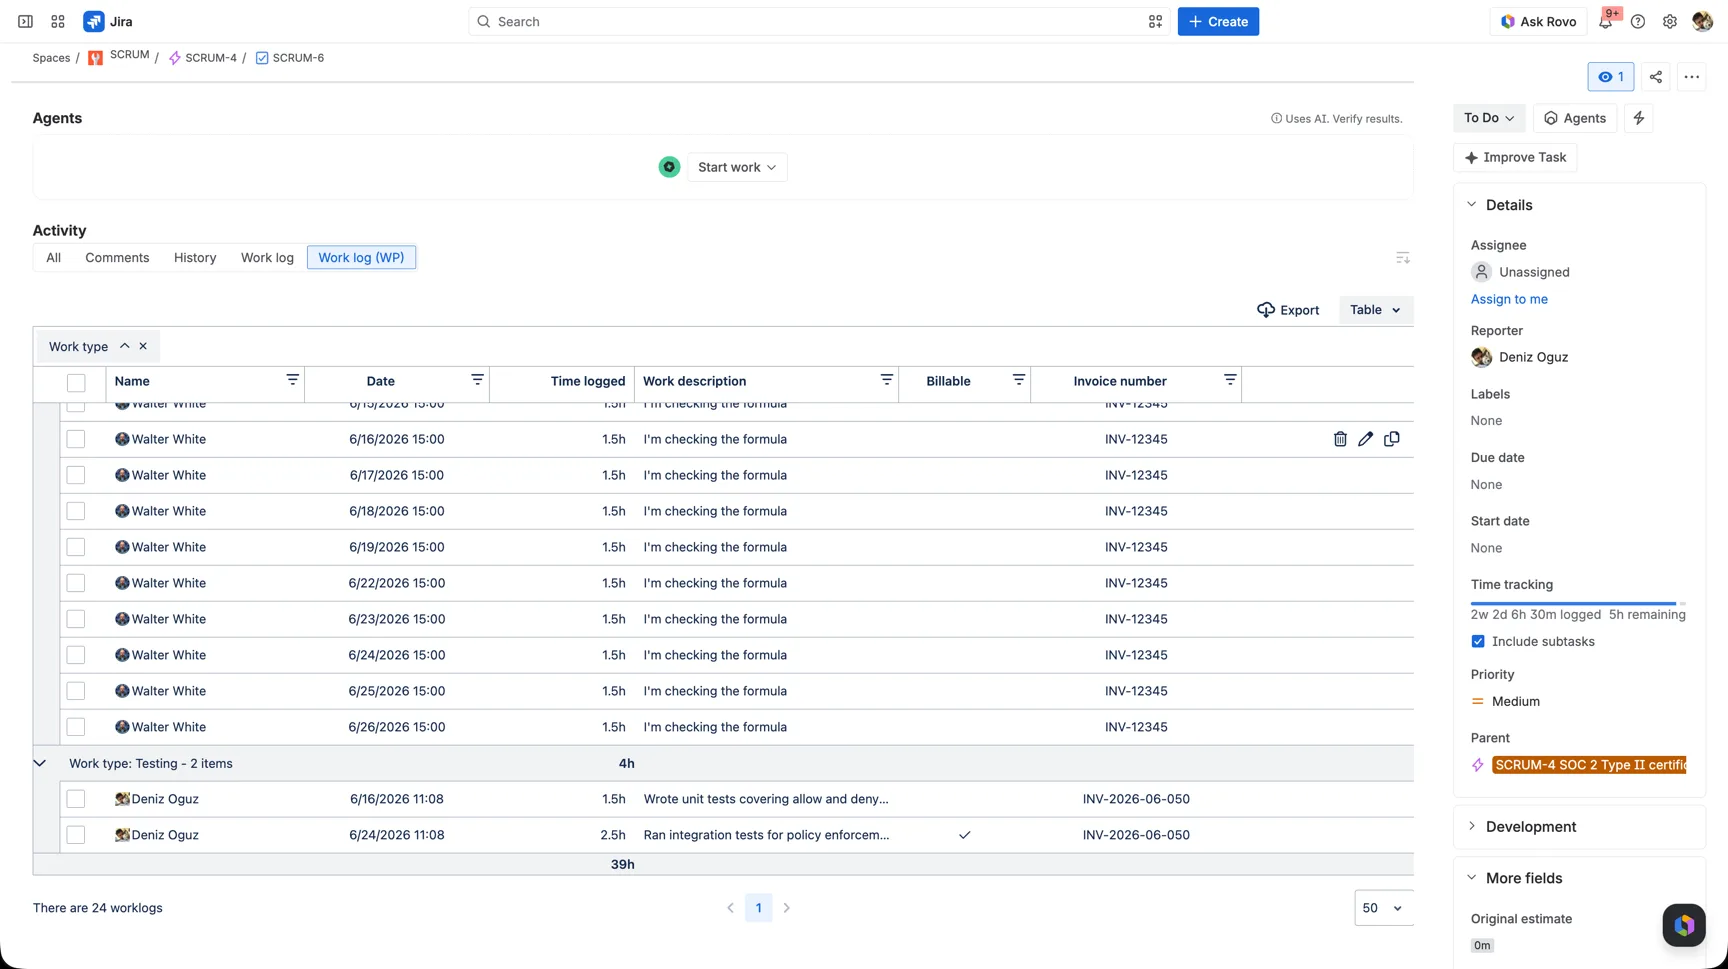
It’s the fastest way to answer “where did the time on this ticket go?” without leaving the issue.
How to set them up
Worklog attributes are configured once, by an administrator, in WorklogPRO’s admin area, not in the everyday app. From Jira’s Settings (gear) → Apps, open WorklogPRO, then choose Attributes in the WorklogPRO admin sidebar. You’ll see every attribute you’ve defined, with its Category (type), Default value, Active state, and whether it’s Required.
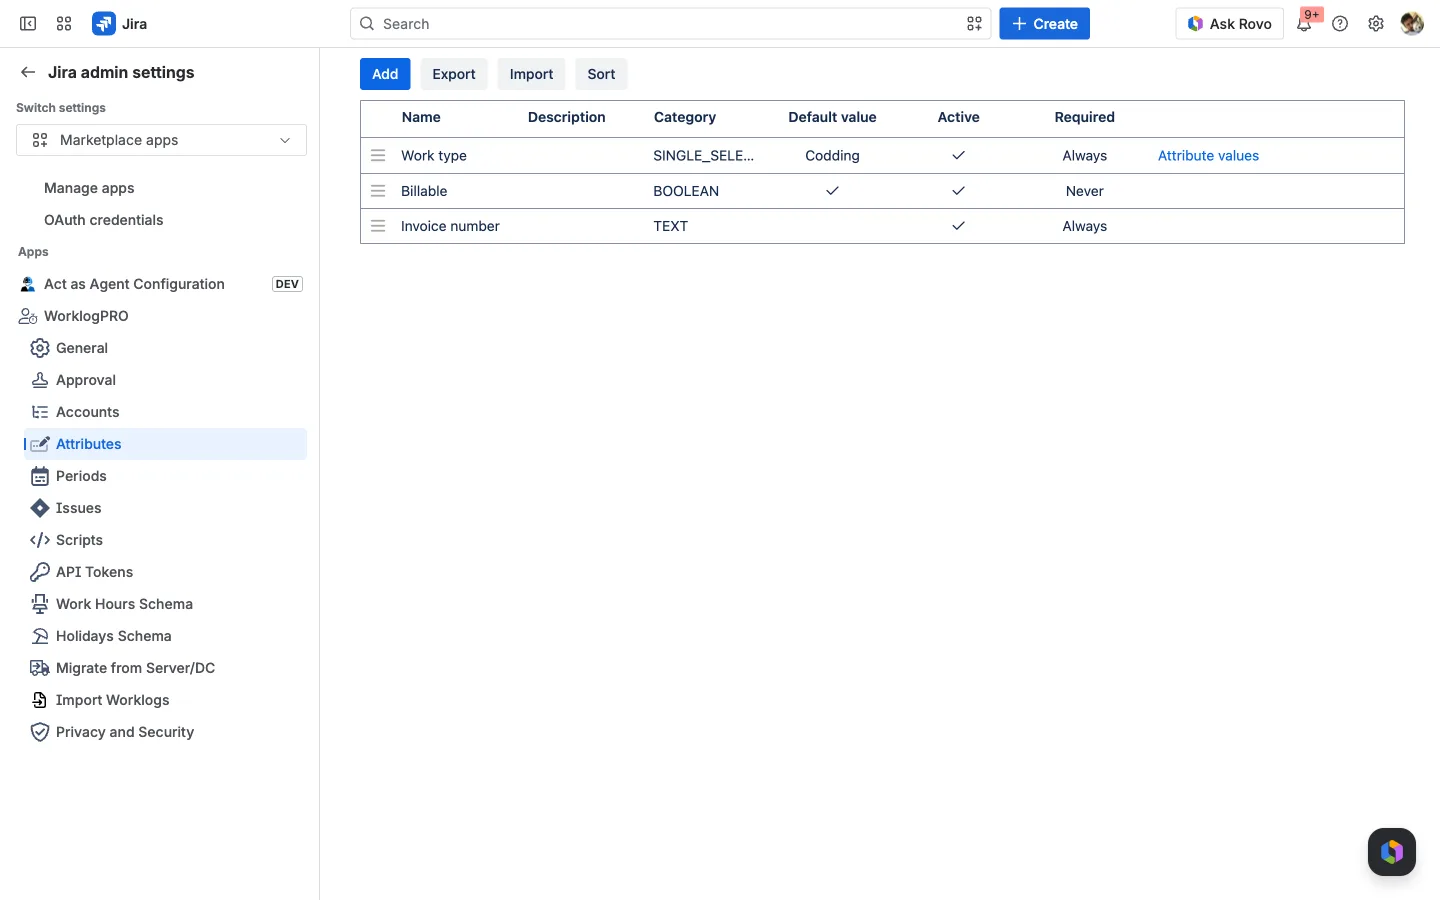
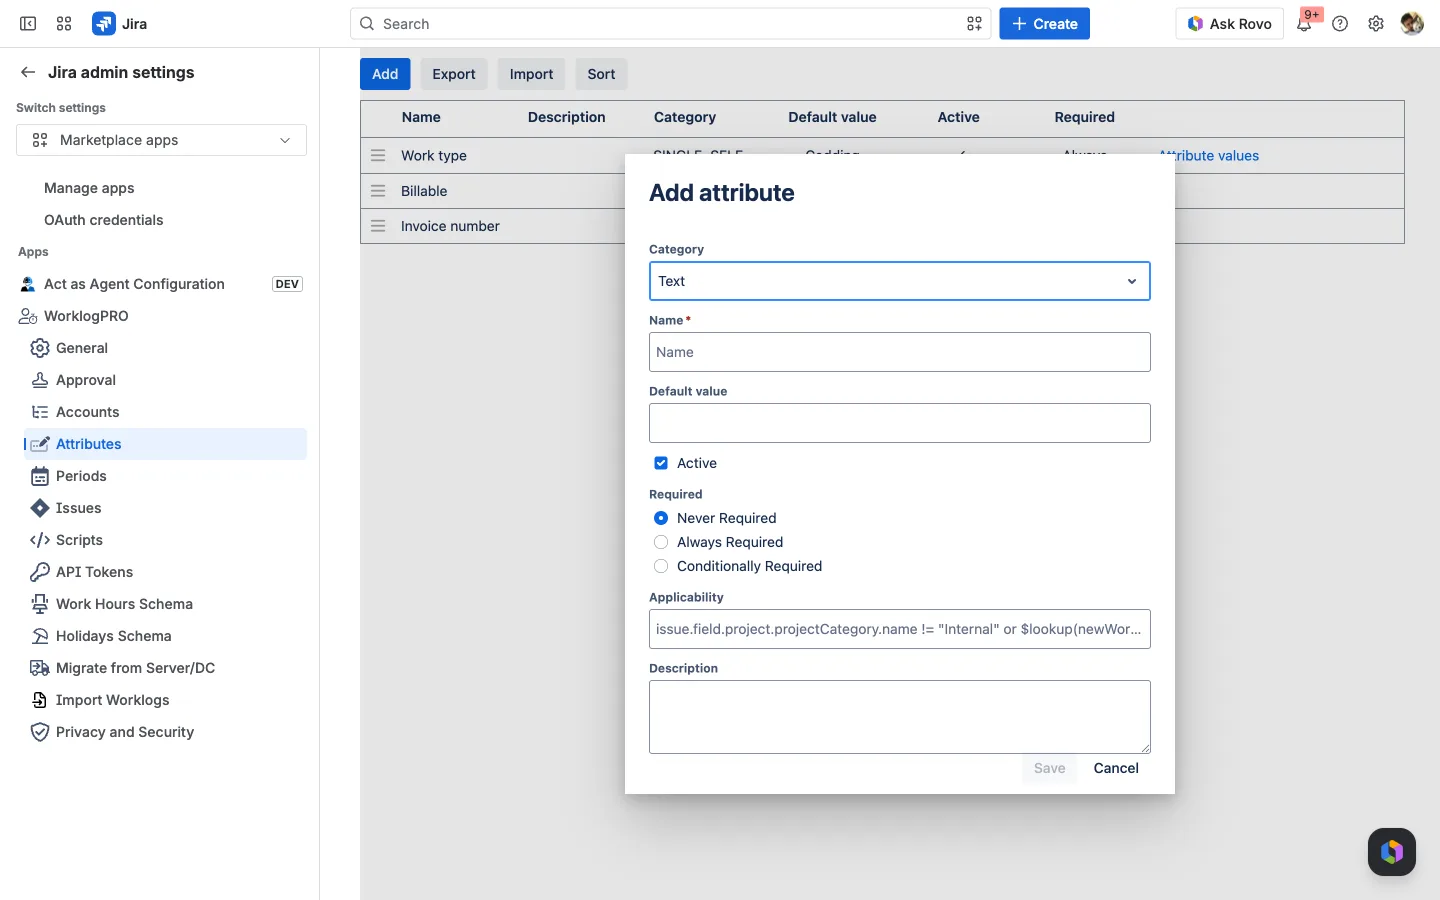
Click Add to create one. The dialog asks for:
- Category: the attribute type. WorklogPRO offers six: Text, Integer, Decimal, Duration, Boolean, and Single Select. (Your Billable flag is a Boolean, Work type is a Single Select, Invoice number is Text.)
- Name: what people see in the Log Work dialog.
- Default value: an optional starting value (hidden for Single Select, which gets its options separately).
- Active: whether the attribute is currently in use.
- Required: a three-way choice of Never Required, Always Required, or Conditionally Required. Pick Conditionally Required and you can supply an Applicability expression, so the field only matters in certain cases, for example, an Invoice number that’s mandatory only on billable, client-project worklogs.
For a Single Select attribute, you add the dropdown options after saving: click the attribute’s Attribute values link and add each value (Testing, Requirement analysis, and so on), marking one as the default if you like. From then on the attribute appears in the Log Work dialog for everyone, and is immediately available as a grouping dimension in reports and a condition in rate-table rules.
A word of restraint: more attributes mean more fields to fill in on every worklog. Define the few that drive real decisions, make those required, and leave the rest. Clean, consistent attributes are worth far more than an exhaustive form nobody completes properly.
The payoff
Plain Jira worklogs tell you how long. Custom worklog attributes tell you what, for whom, billable or not, and on which invoice: the context that turns a pile of hours into reports you can bill, budget, and plan from.
Try it on your own Jira. WorklogPRO is on the Atlassian Marketplace with a free trial. Define a couple of attributes, log a week of work with them, and watch your reports get sharper.
This article is part of our Jira time tracking guide: plan, bill, and scale smarter.